
Introduction
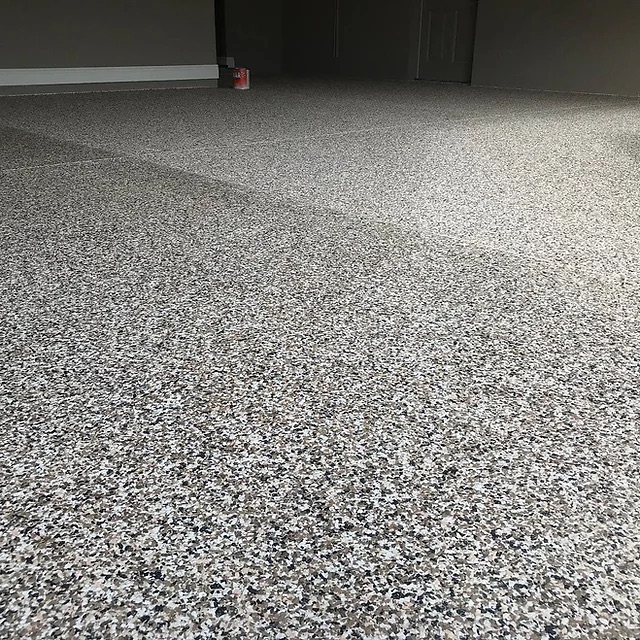
Garages have evolved from mere storage spaces to essential extensions of our homes, often doubling as workshops, hobby zones, and even home gyms. In this transformation, the importance of a durable and aesthetically pleasing floor cannot be overstated. Enter epoxy flooring, a popular choice that combines robustness with visual appeal, making it an ideal option for modern garages.
Benefits of Epoxy Flooring in Garages
Epoxy flooring stands out for its myriad benefits, making it a superior choice for garages. Its durability is unmatched, capable of withstanding heavy traffic, dropped tools, and the weight of vehicles without showing signs of wear. Unlike concrete, which can crack and chip, epoxy forms a hard, resilient surface that protects the underlying substrate.
Resistance to stains is another compelling advantage. Garages often face spills from oil, gasoline, and other chemicals. Epoxy’s non-porous surface prevents these substances from seeping in, making clean-up a breeze. This resistance extends to water and moisture, which can cause damage and mold in unprotected concrete floors. Epoxy creates a barrier, safeguarding your garage from such issues.
Ease of cleaning further enhances epoxy’s appeal. A simple sweep and occasional mop keep the floor looking pristine. Its seamless finish means there are no grout lines or crevices where dirt can accumulate. This makes maintaining a clean and tidy garage not only feasible but straightforward.
Installation Process
Installing epoxy flooring in a garage involves a meticulous process, but the results are well worth the effort. Here’s a step-by-step guide to help you understand what’s involved:
- Preparation: Start by clearing the garage of all items. The concrete floor must be clean, dry, and free of any existing coatings. This often requires etching the surface with a concrete cleaner or acid, followed by thorough rinsing and drying.
- Repairs: Inspect the floor for any cracks or holes. These should be filled with an appropriate concrete patch product. Once patched, allow sufficient time for the repairs to cure completely.
- Primer Application: Applying a primer helps the epoxy adhere better to the concrete. Roll on the primer evenly and let it dry as per the manufacturer’s instructions.
- Mixing the Epoxy: Follow the instructions on your epoxy kit to mix the resin and hardener. This step is crucial as incorrect mixing can affect the curing process and final finish.
- Application: Pour the mixed epoxy onto the floor and use a roller to spread it evenly. Start from the farthest corner and work your way towards the exit to avoid trapping yourself in a corner. Depending on the kit, you may need to apply multiple coats.
- Adding Decorative Elements: If you’re adding color flakes or other decorative elements, sprinkle them onto the wet epoxy. This not only enhances the appearance but also adds texture, reducing slipperiness.
- Curing: Allow the epoxy to cure fully. This can take anywhere from 24 to 72 hours, depending on the product and environmental conditions. Avoid walking or driving on the floor during this time.
Maintenance Tips
Keeping your epoxy floor looking new requires minimal effort, but a few maintenance tips can ensure its longevity:
- Regular Cleaning: Sweep the floor regularly to remove dust and debris. Use a soft-bristle broom to avoid scratching the surface.
- Mopping: For a deeper clean, mop the floor with a solution of water and a mild detergent. Avoid using acidic or abrasive cleaners as they can damage the epoxy.
- Spill Management: Clean up spills promptly to prevent staining. Although epoxy is resistant to most chemicals, prolonged exposure can cause discoloration.
- Protective Measures: Place mats or pads under heavy equipment to prevent scratches. If you’re using your garage as a workshop, consider adding rubber mats in high-traffic areas.
- Inspect Regularly: Periodically check for any signs of damage or wear. Small issues can often be addressed with touch-up kits, preventing them from becoming larger problems.
Cost and ROI
The initial investment for epoxy flooring can vary, typically ranging from $3 to $12 per square foot, depending on the quality of the materials and the complexity of the installation. While this may seem significant compared to other flooring options, the long-term benefits make it a worthwhile investment.
Epoxy flooring adds considerable value to your home. Its durability reduces the need for frequent repairs or replacements, saving money over time. Additionally, the enhanced aesthetic appeal can increase the market value of your property, making it more attractive to potential buyers.
In terms of return on investment (ROI), epoxy flooring offers substantial benefits. The low maintenance requirements and long lifespan mean you’ll spend less on upkeep. Moreover, the protective qualities of epoxy can extend the life of your concrete floor, preventing costly structural repairs.
Conclusion
Epoxy flooring presents a blend of durability, ease of maintenance, and aesthetic versatility, making it an ideal choice for modern garages. From its robust resistance to stains and chemicals to the straightforward installation process, epoxy flooring transforms your garage into a functional and visually appealing space. The initial investment is justified by the long-term savings and potential increase in property value. Consider epoxy flooring for your garage to enjoy these myriad benefits and elevate the overall quality of your home.